


Mount Fuji Hiking Guide: Our Experience of Bullet Climbing Mt Fuji
Discover the ultimate Mount Fuji hiking guide. Read on to discover everything you need to know about climbing Mount Fuji – plus our experience of bullet climbing.
Climbing Mount Fuji had been on our bucket list for many years. But, as we were visiting Tokyo during the perfect season – more on that later – we finally decided to take the plunge.
We’ll level with you: it was not easy. But, those with a moderate level of fitness can climb Mt Fuji with little issue. We bullet climbed (which technically we shouldn’t recommend, but found that it worked great for us.)
It’s also true that trying to organise the entire climb can feel overwhelming. Which is where this handy guide comes in.
How Long Does it Take to Climb Mount Fuji?
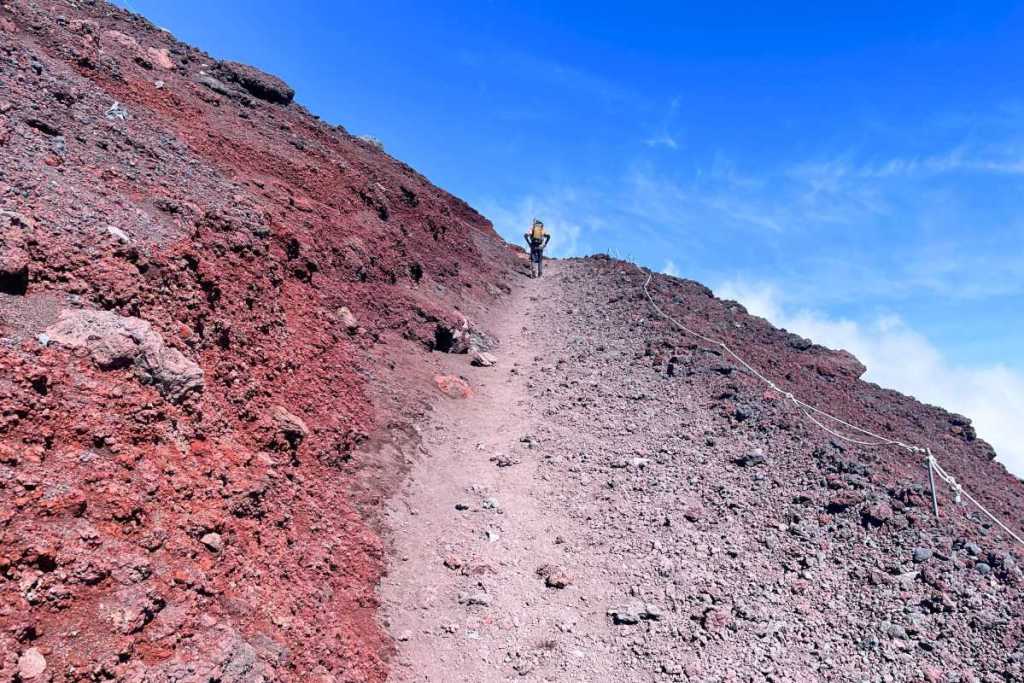
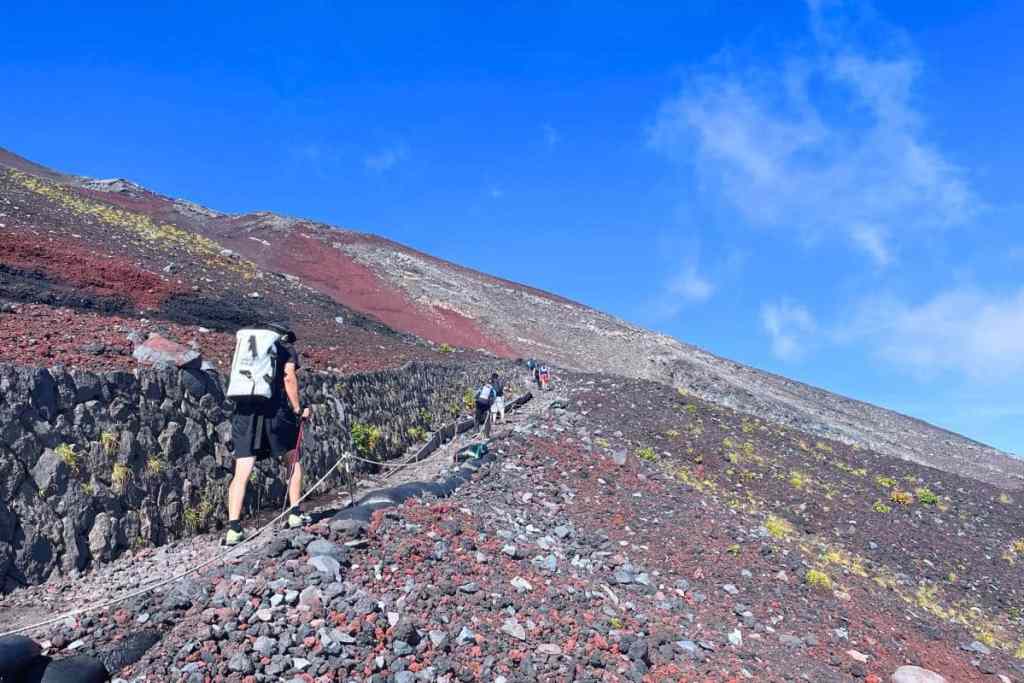
This route to the summit is filled with loose volcanic rock.
Mount Fuji is no quick stroll. In fact, the time it takes to climb Mount Fuji largely depends on the chosen route and your fitness level. That said, we think it’s one of the best mountains to climb as a beginner.
The most popular routes, such as the Yoshida Trail, typically take about 5-7 hours to ascend and 3-5 hours to descend. This allows you for short but regular breaks, plus time to acclimatise to the altitude.
Keep in mind that weather conditions, such as strong winds or heavy snow, can impact your climbing time.
Mount Fuji Elevation
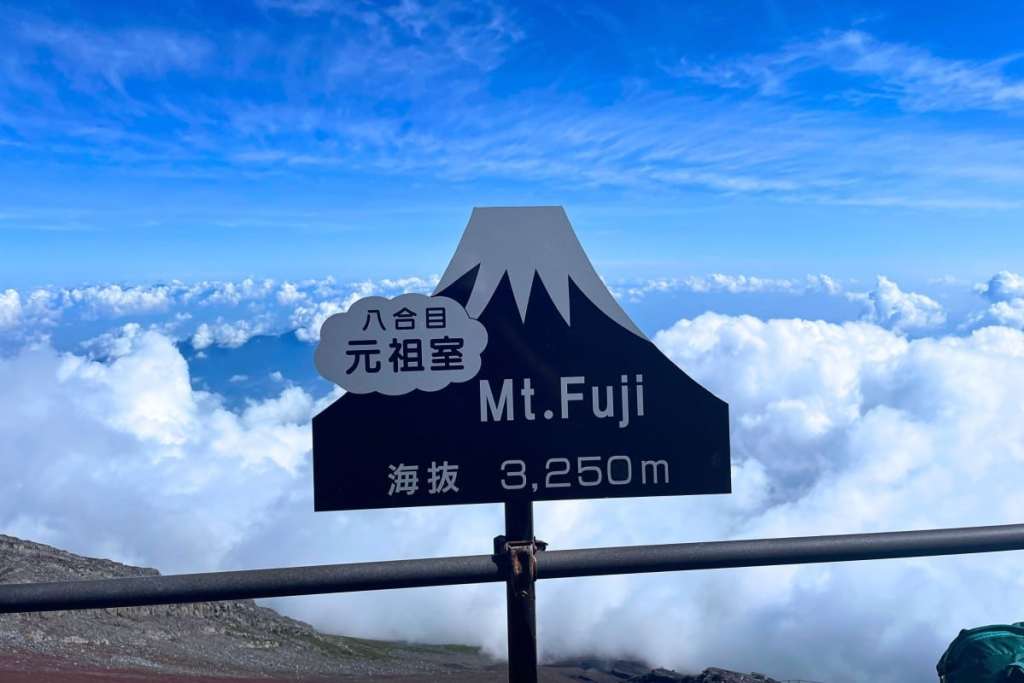
Handy elevation markers dot the trails of Mt Fuji to remind you how far you’ve climbed.
Mount Fuji stands at an elevation of 3,776.24 metres (12,389 feet) above sea level. It is the highest peak in Japan and is part of the Fuji-Hakone-Izu National Park.
Many Japanese climbers carry oxygen canisters with them to combat altitude sickness – you can even buy these on the mountain. We didn’t want to use them, so we recommend climbing slowly and giving yourself plenty of time to adjust.
Mount Fuji Climbing Season
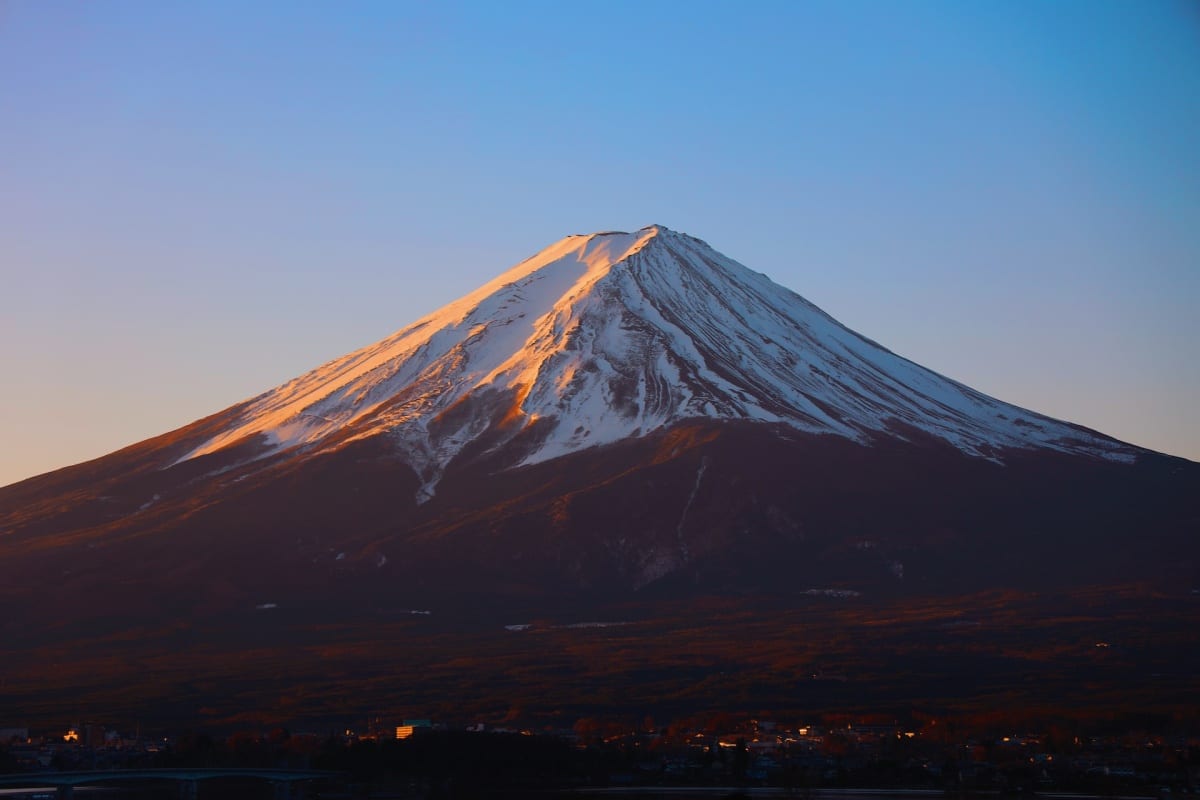
The peak of Mount Fuji is covered by snow for most of the year making it very dangerous to climb.
The Mount Fuji climbing season spans from early July to early September. The ascent is demanding, so a clear, stable weather window is crucial for a safe and enjoyable experience.
We urge you to keep an eye on the weather forecast before and during your climb. Any sign of bad weather would have made us incredibly uncomfortable and we would have aborted.
The summer months are the best time to climb Mount Fuji, though depending on which trail you choose this shifts slightly. If you’re tackling the Yoshida Trail, climb between 1st July and 10th September, and for the Subashiri, Gotemba, and Fujinomiya trails, the 10th July to 10th September is ideal.
The peak season for climbing Mount Fuji is during the school vacations which last from around 20th July until the end of August. We highly recommend avoiding climbing during Obon Week in mid August. It’s common for climbers to stand in queues at some passages throughout the week, so it can be pretty unpleasant.
Mount Fuji Climbing: Weather
Monitoring the weather before and during your climb is crucial. We were glued to the following in the lead up to our summit:
Japan Meteorological Agency so that we could check for potential rain during our climb.
Climate Forecast to give us a clear and accurate insight into the temperature whilst we were climbing.
Snow Forecast as while unlikely during the summer months, snow is not totally unheard of. Any major snowfall would have scuppered our plans.
This website provides a mountain climbing index on an A,B, or C scale – this is super useful as it determines how preferable conditions will be throughout the day of your climb.
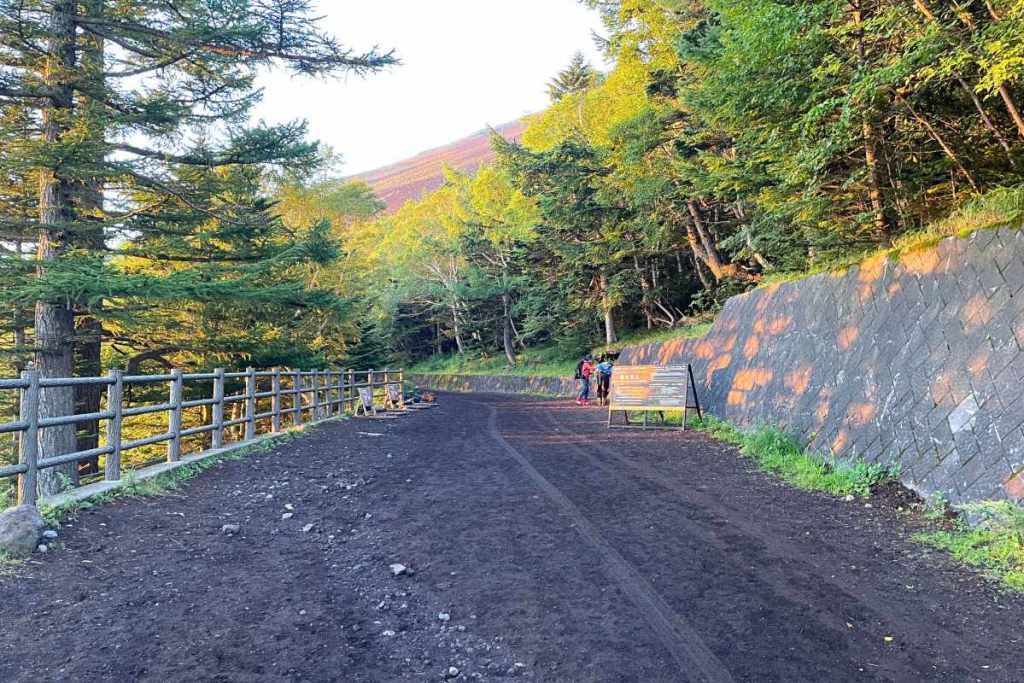
Choosing a Mount Fuji Trail
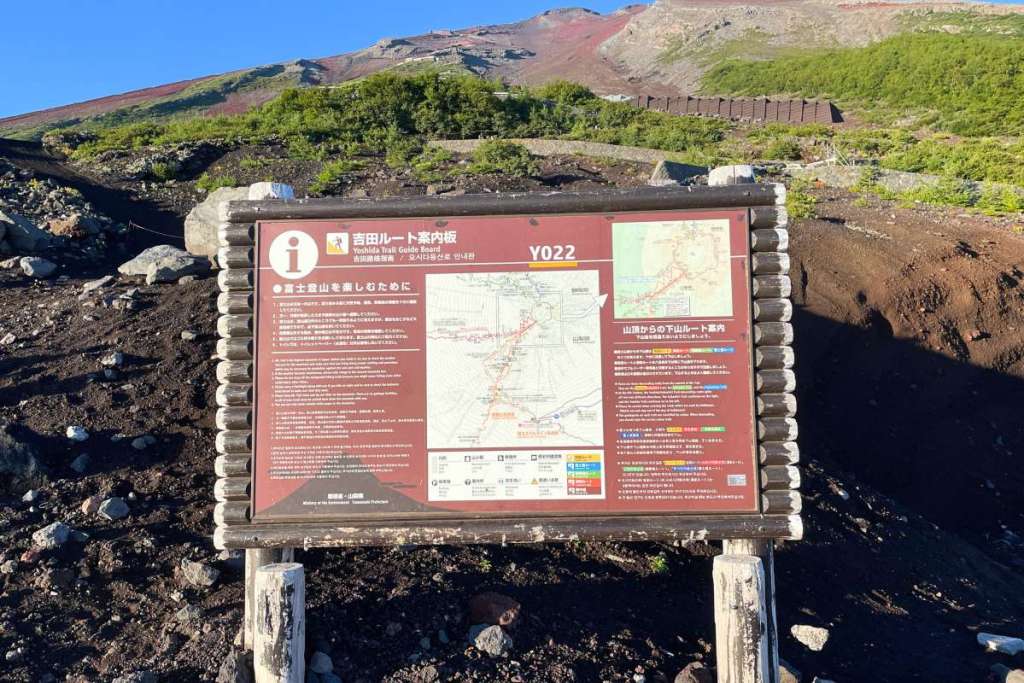
There are plenty of maps and sign posts along the trail to help with navigation.
You’ll want to plan your Mt Fuji trail well in advance of climbing – let’s take a look at the different trails.
Yoshida Trail
Not sure where to start? The Yoshida is the most popular trail and the one we recommend.
It starts from the 5th Station on the north side, and offers a good balance of challenge and accessibility. The only downside is that it can be one of the most crowded trails.
Subashiri Trail
Known for its scenic beauty, the Subashiri Trail starts at the Subashiri fifth station and merges with the Yoshida Trail higher up at the 8th Station. This trail offers a more varied and less congested ascent compared to Yoshida.
Gotemba Trail
Looking for something less crowded but more difficult? Known for its rugged and less-travelled path, the Gotemba Trail provides a longer and more challenging ascent.
The trailhead starts at the Gotemba 5th Station, and hikers traverse through a diverse landscape. This trail is recommended for experienced climbers looking for a less popular adventure.
Fujinomiya Trail
The Fujinomiya Trail starts from the 5th Station on the south side and offers stunning views of the Pacific Ocean. The Fujinomiya Trail is less crowded, making it an attractive option for those seeking a more secluded experience.
As the shortest route to the summit, steep ascents and rocky sections characterise this trail – it’s a challenging yet rewarding climb.
What to Bring
We like to think we were extremely prepared to climb Mount Fuji. And it definitely paid off. At a minimum, we recommend you bring the following:
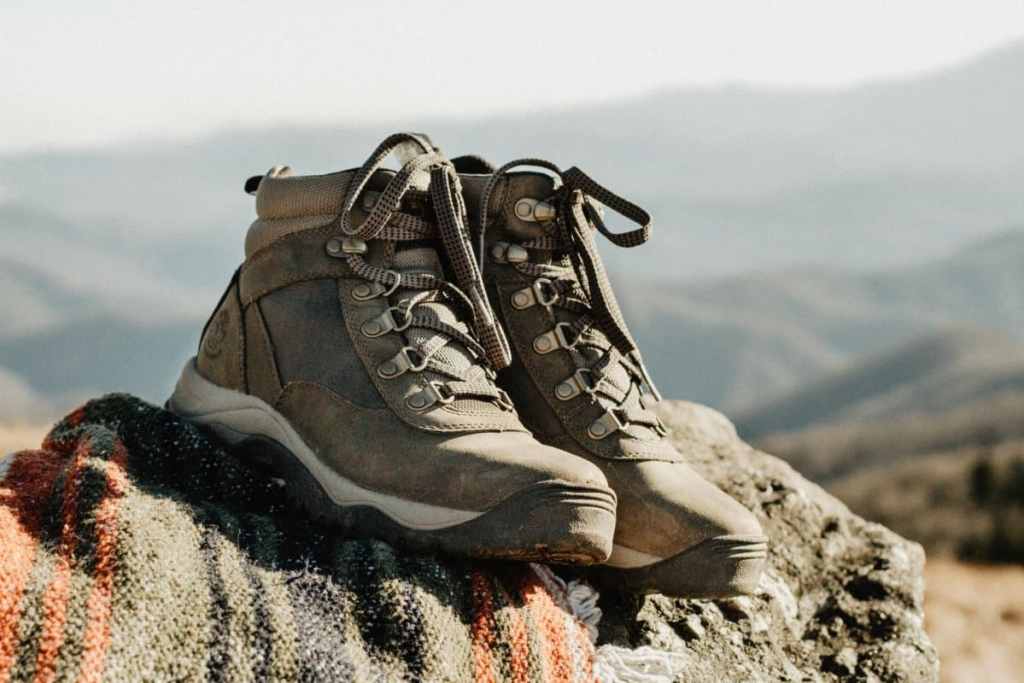
Good boots or hiking trainers are essential
Hiking poles were also a must for us. They were incredibly helpful, especially on the way down, to take some of the strain off our knees.
Waterproofs (luckily we didn’t need them, but it is always a must as the weather can change fast)
Plenty of water. We were amazed at how much we drank and didn’t need the toilet (meaning our body was using it all up.)
Lots of snacks (energy bars, fruit, oats, nuts)
A mini medical kit with paracetamols, plasters, and suncream
Money, especially plenty of 100 yen coins for bathrooms.
A light but durable backpack to carry everything you need up the mountain.
Mount Fuji Hiking Guide: Our Experience
Renting Climbing Gear
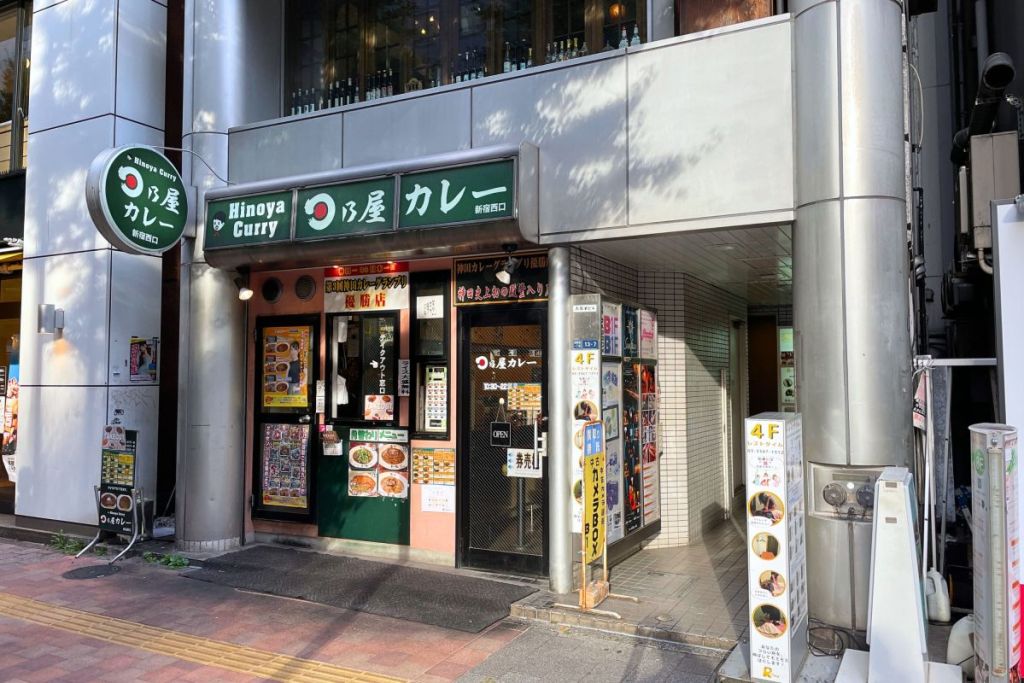
The entrance to Yamarent’s Shinjuku store can be found next to this curry restaurant. Head down the corridor and take the elevator to the 6th floor.
While others chose to bring all their own gear to climb Mount Fuji, we had limited bag space so had no choice but to rent while in Tokyo. For this, we highly recommend Yamarent.
It was a straightforward system. We booked an appointment online to visit their Shinjuku store, which is located on the 6th floor of a rather inconspicuous-looking building.
We paid £41.20 (around 7500 Yen) for our gear and chose to rent:
Hiking boots (note that it’s near-impossible to find anything bigger than a UK 11)
Trekking poles, which were very useful when coming down Mt Fuji
Waterproof jacket and trousers
They threw in a free pair of hiking socks, which we thought was a nice touch. We also returned the equipment to the store after we climbed, but you can also arrange for collection from your hotel.
Getting to Mount Fuji From Tokyo
Getting to Mount Fuji from Tokyo is easy during peak season (July to September). You can take a bus from Shinjuku directly to Mount Fuji 5th Station. It takes around two and a half hours and is an incredibly scenic route.
You can book your bus through this website – it costs around 3800 yen one way.
Mount Fuji 5th Station
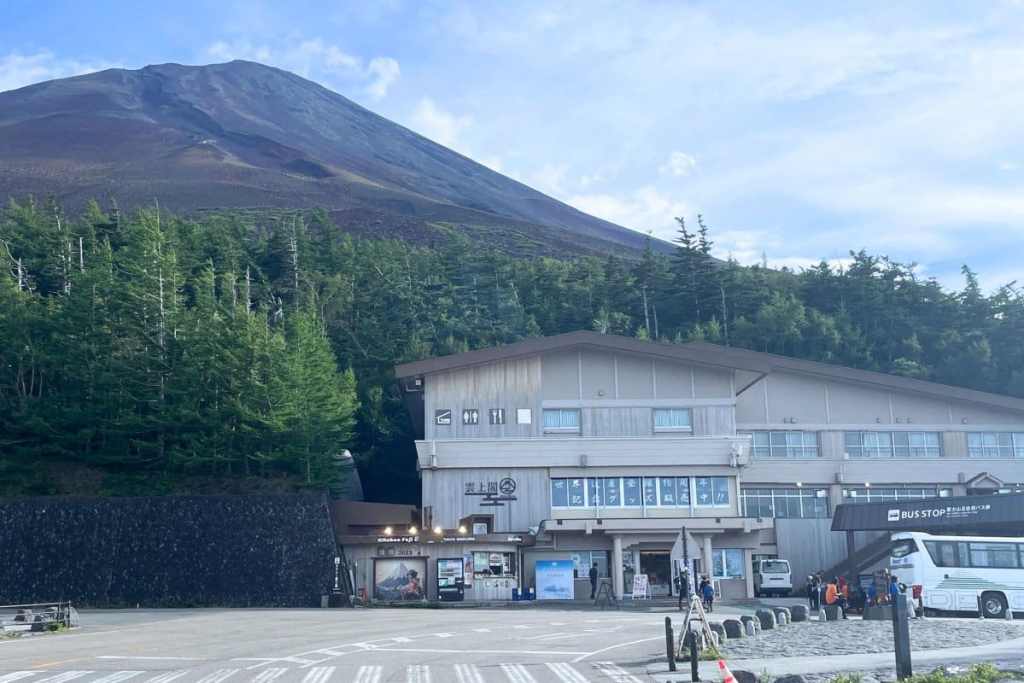
We spent the night before the climb at Fujikyu Unjokaku.
We chose to stay overnight at the 5th Station on Mount Fuji. This is a crucial starting point for climbers, located at an elevation of 2,305 metres (7,562 feet). We recommend staying overnight if you are bullet climbing as it gives you time to adjust to the altitude.
This station serves as a gateway to the higher reaches of the mountain and is easily accessible by car or bus. There are multiple restaurants and shops at this level, as well as the stunning Fujisan Komitake Shrine. We enjoyed a delicious curry with Mount Fuji views before stocking up on souvenirs the night before we climbed.
Bullet Climbing Mount Fuji
We had a terrible night’s sleep – a mix of nerves and excitement kept us up for hours. We set our alarms for 4:45 am as we wanted to leave early.
There are a number of trails to choose between, but we chose to hike the Yoshida Trail as it is the most popular (and one of the easiest.) We tracked our hike with the Mt Fuji app, which meant that we could record exact timings.
After scoffing some breakfast and getting layered-up, we started the climb at 5:23am.
The first thing you’ll notice are the eagle-eyed staff members who collar you and take you to the reception area where you make a 1000 yen payment at the start. This helps to support the area and also means you get a small wooden block with the date of the climb on it.
It was very cold at the start of the climb but, as soon as we started moving, we warmed up and even had to take our jumpers off. One thing we noticed was that the paths were very well sign posted all the way.
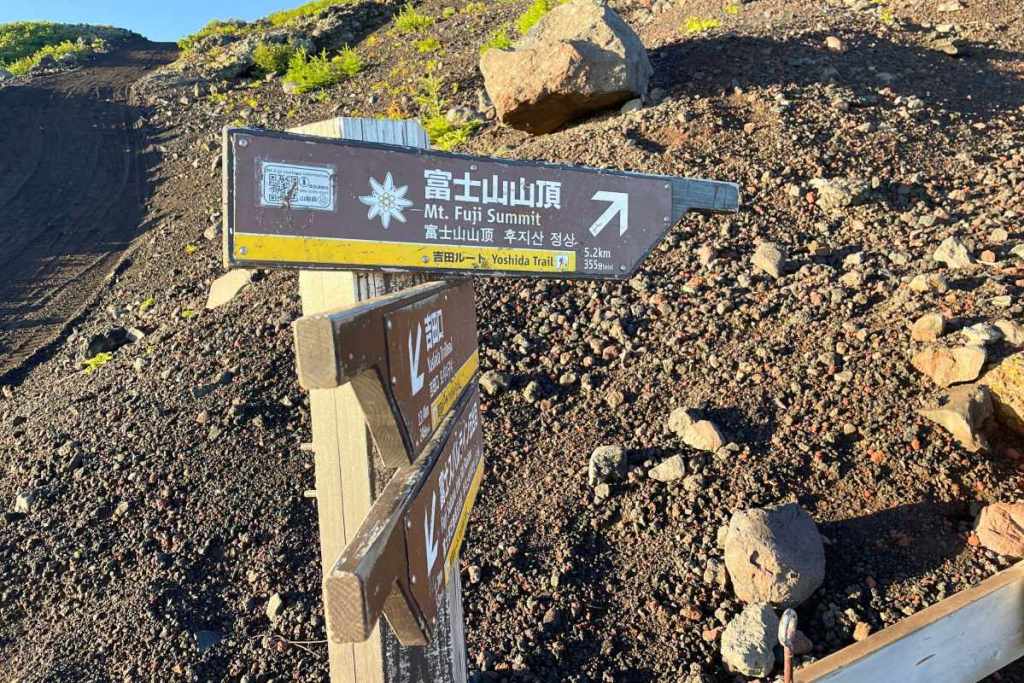
The paths on Mount Fuji are colour-coordinated and very clearly marked.
The beginning of the Yoshida Trail was fairly flat, but the views were already insane. Then we hiked through a little forest area to reach the 6th station. We were eager to start and worried about timing because of bullet climbing, but we should have paced ourselves a little better at the start. We quickly realised it’s better to take it steady.
At the 6th Station is where it starts to get steep. It’s like that all the way up until the summit, complete with gravelly paths.now on until the top.
There were SO many switchbacks all the way up the mountain. We also noticed it was HOT. Make sure you take plenty of sunscreen and bring a change of clothes. We paid the 200 yen fee for the bathroom to get changed into shorts and packed our excess layers away.
The Hardest Part of the Yoshida Trail
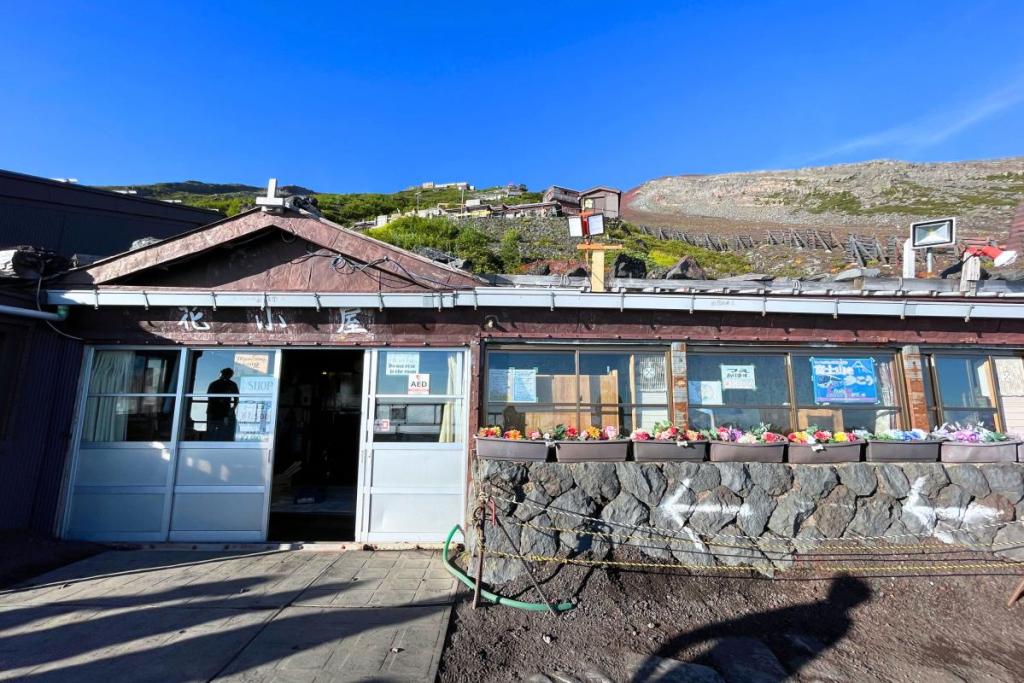
There were lots of huts along the trail to stop and take a break at.
Then we continued on to the 8th Station. There were lots of huts on the way from 7th to 8th Station as this is one of the longer stints that typically takes about 100 mins. Here’s also where most people sleep over to make the summit for sunrise. There’s also some food at this station, though it’s very expensive.
This part was the hardest, so we broke it up into sections and focused on using the huts as checkpoints, which seemed to work in boosting morale. There were also much-welcomed benches to take a rest on in between the steep volcanic rock. Be prepared to scramble and make sure to eat and drink frequently.
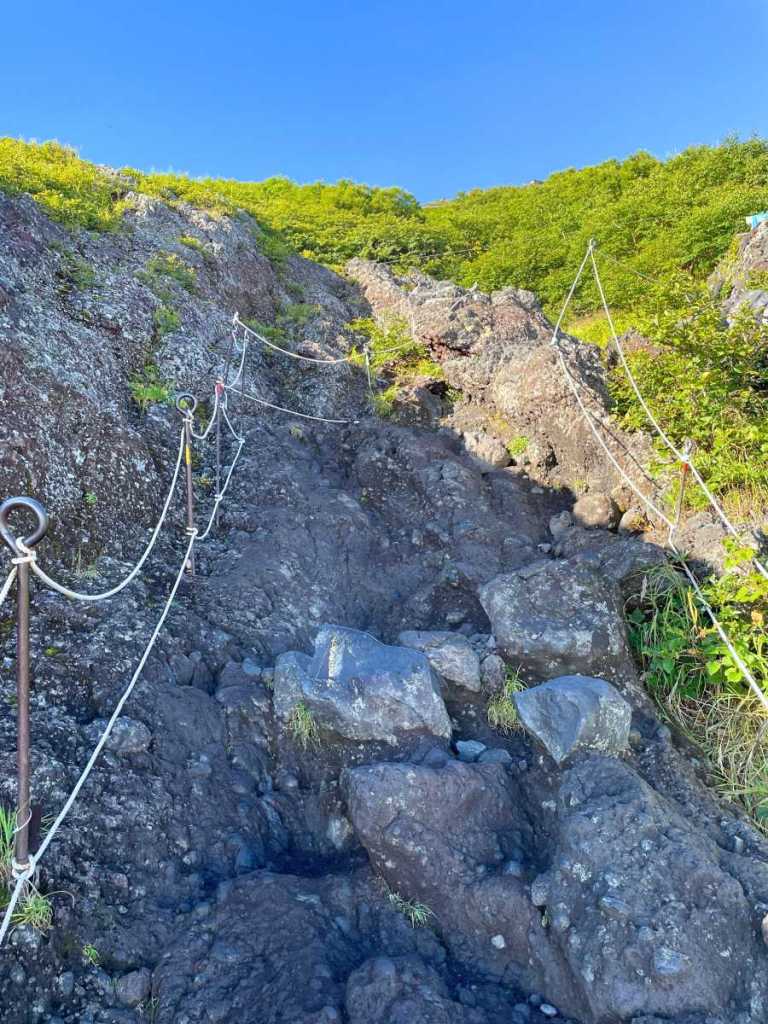
Scrambling was necessary for some of the terrain.
Once you’re past the 8th Station, altitude sickness can begin to take effect – so take it slow. We were confident with our timing at this point so we felt more relaxed and really began to enjoy the insane views. Chris was super happy that we had finally made it to Japan and that he was climbing a mountain that he had wanted to climb since he was a kid.
The Final Push
Next, it was time for the final leg between 8.5 and the 9th station. It took us around 60 minutes, and there were plenty more scrambling and gravel paths.
We’ll be honest, it’s not the most exciting mountain in terms of terrain and environment. But we still loved it and the views certainly make up for it.
Once we reached the top, we headed to the famous gate to snap a photo. We reached the summit at 10:17am and spent about 40 mins there (though you can spend as long as you like recovering.)
If you have any energy left, you’re free to explore. Otherwise, most people get ramen from one of the shops, relax on giant cushions in front of the crater, or just chill and enjoy the view. We enjoyed lunch whilst taking in the moment.
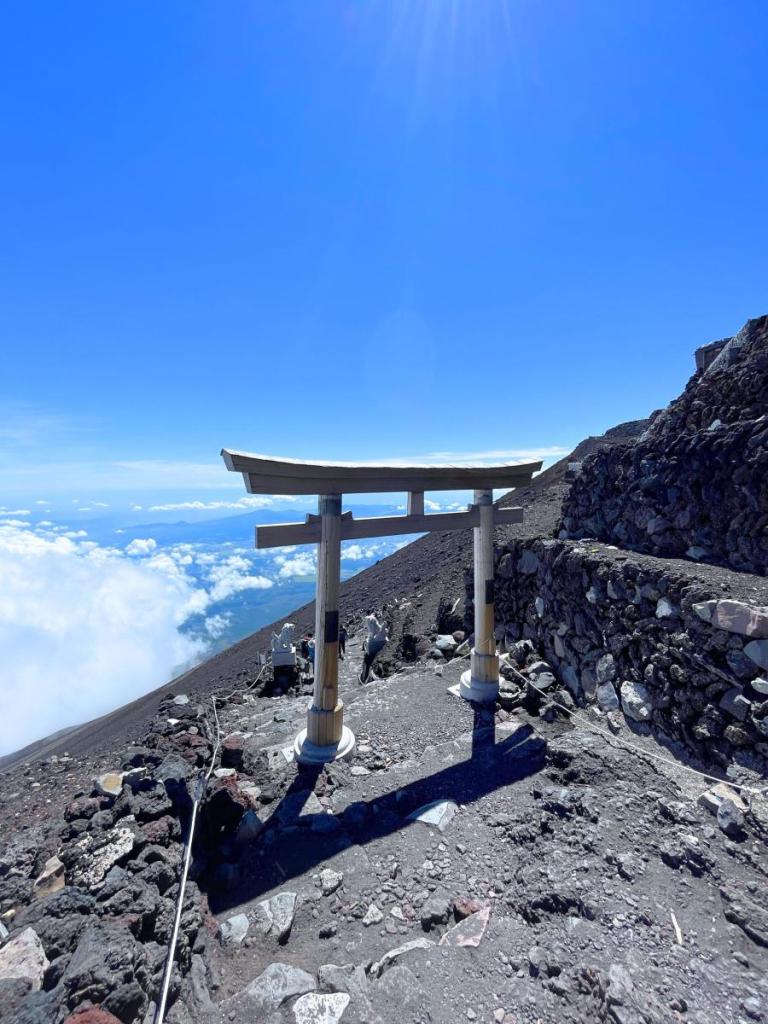
It was sunny with clear skies at the very top. We were worried about the temperature at that altitude, but the sun kept it warm enough that we were happy in shorts and t-shirts the entire way. Coming down, though, was when things got a little bit chillier.
The Descent

The descent was filled with never ending switchbacks
Finally, it was time to trek down – this was much harder. You’ll see some people opt to run down the steep gravel paths, but we recommend taking it slow and steady. You need to be careful not to slip on the gravel and be in total concentration mode all the way down the mountain.
If, like us, you take the Yoshida trail, there is a dedicated path up and down Mount Fuji, which makes things a lot easier.. The path down is almost the same terrain all the way to the end.
A word of warning: you will be sore at the end. Especially your knees as they take a continual beating. Also, there are no toilets for almost all of this section of the climb so make sure to go when you’re at the top.
Once you get back to the 8th Station, make sure you follow the correct path because there are two options. It’s well-signposted but just make sure to take the yellow path. Eventually, at the bottom of all the never-ending switchbacks, the trail flattens out a bit.
From here it took us around 45 minutes to hike to the 6th station before rejoining the original trail and following it all the way back to the 5th station.
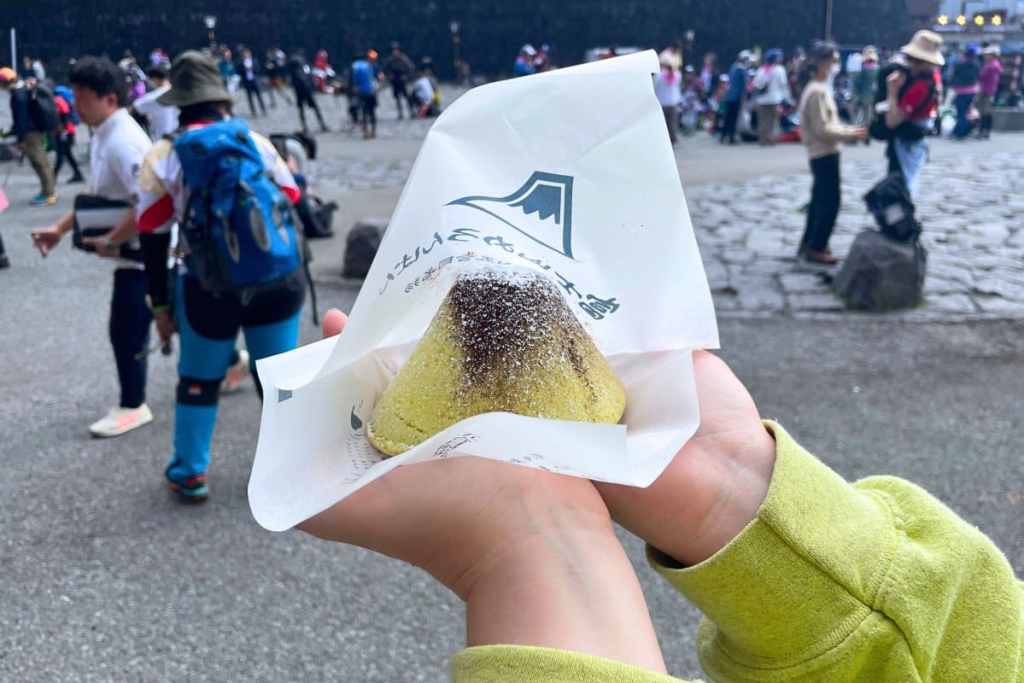
We made it! Our reward? Mount Fuji melon bread. Which was absolutely delicious, by the way.
We completed the climb at 2:01pm, which means it took 8 hours and 38 mins. This is pretty standard for bullet climbing, but always make sure to allot yourself more time than you think you will need because you do not want to get stranded on Mount Fuji alone.
Getting From Mt Fuji to Tokyo
To get back to Tokyo, we used the same bus. We booked the last one of the day (this is usually around 5pm) but actually managed to swap this for an earlier bus – something to note if you’re planning on bullet climbing.
